iOS - Programatic UI Development in Xcode 11

When you start a new project, Xcode 11 gives you two options on how you'd like to handle the development of your UI. SwiftUI or Storboards. Those are your only options when using Xcodes built in templates. Many more devs these days are preferring to go with a programatic approach, bypassing WYSIWYG editors altogether.
True, SwiftUI is all done in code and includes a neat way to preview your layouts, but I feel that it's not quite ready for primetime just yet. So what can we do?
Unfortuneately Xcode no longer allows you to setup a project without either of these options. If we want to go full programatic, handle segues, animations and wrestle with autolayout manually, we'll have to choose an option and modify it to our use case.
I'll run through getting setup with a new project, modifying it for programatic UI development, show you how to arrange a few views and navigate to other controllers.
New Project
You can skip the next two sections by downloading this Xcode template that will handle all of this for you.
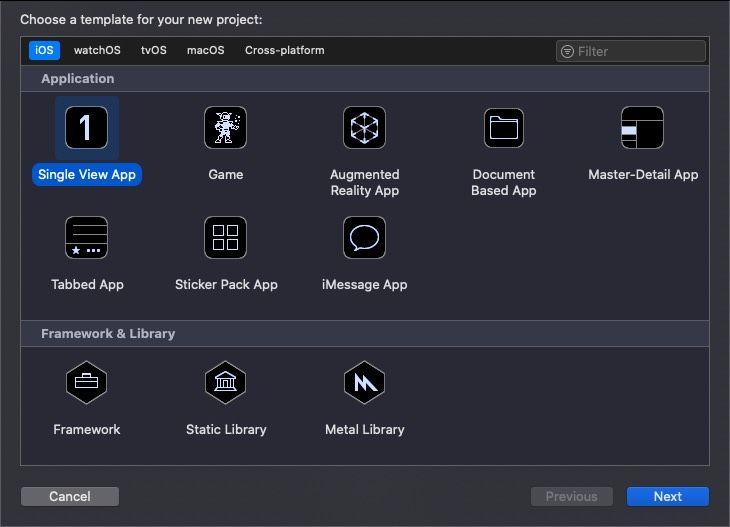
1. We'll get started by creating a new iOS project using the single view template.
2. In the next step create a name for your project and make sure that you have the Storyboard option selected in the dropdown. Don't worry, we'll be deleting it anyway.
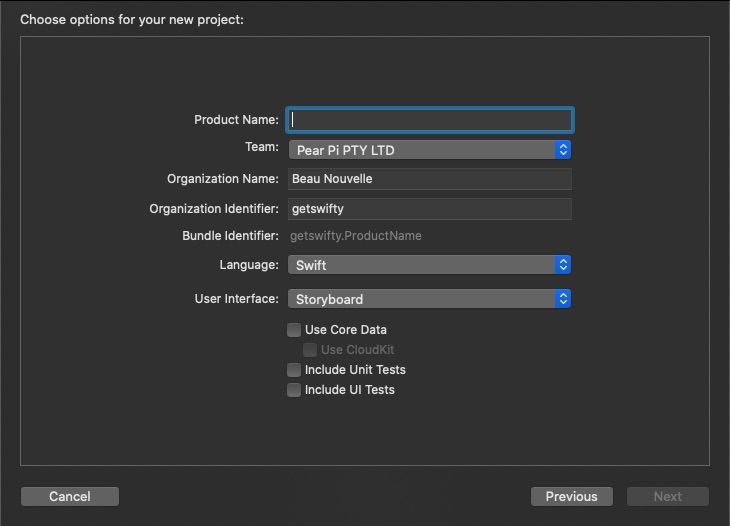
3. On the final, choose a save location, and for this guide we won't worry about setting up git, so you can uncheck that box.
Your Project
1. Next you'll be presented with the main Xcode interface, with the project settings displayed in the center of the window. On the left of the screen you should see the project navigator:
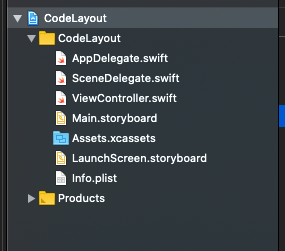
2. Delete Main.storyboard from within the project navigator.
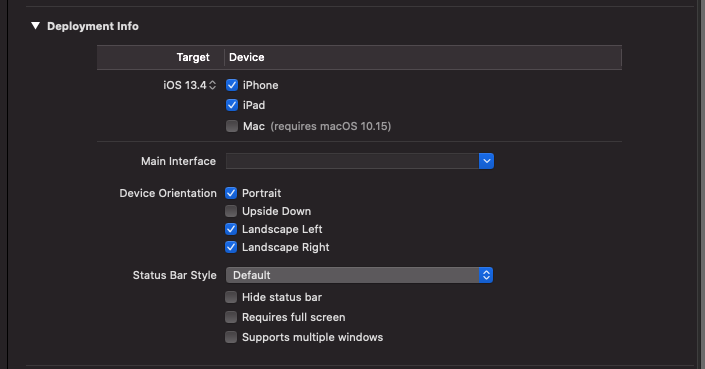
3. In the project settings, delete the text inside Main Interface
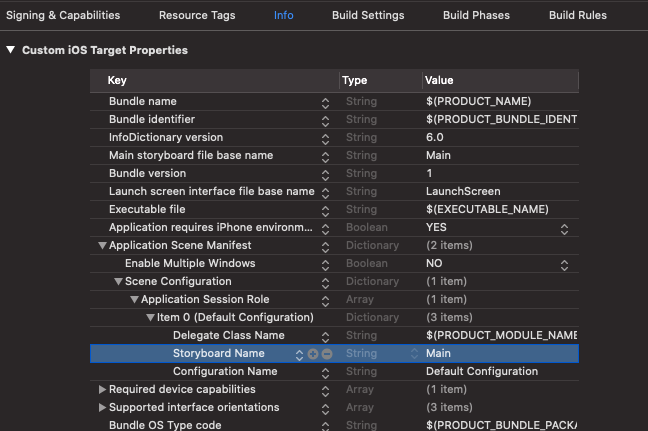
4. Click on the Info tab, open up Application Scene Manifest row and find the line with Storyboard Name. Delete this row, and change Enable Multiple Windows value from NO to YES.
5. Open up SceneDelegate.swift and replace the code inside the willConnectTo function with the following:
guard let windowScene = (scene as? UIWindowScene) else { return }

window = UIWindow(frame: UIScreen.main.bounds)
window?.windowScene = windowScene

let navC = UINavigationController(rootViewController: ViewController())
window?.rootViewController = navC
window?.makeKeyAndVisible()
If you run your app now, you should see a black screen.
Layout Out Views
1. Open up ViewController.swift and create a new UIButton at the top of the class.
let button = UIButton()Notice how there's no @IBOutlet or a weak reference. @IBOutlet is what links the button to a storyboard or xib file. Usually with storyboards, it's the view that has a strong reference, which is why we give the view controller a weak one. Since this button has been created entirely within the view controller, we give it a strong reference. There's loads of articles out there explaining the differences between strong and weak references. Hit up google you'd like to know more.
2. Inside the viewDidLoad function we'll add the button as a subview and setup a few constraints.
override func viewDidLoad() {
    super.viewDidLoad()

    button.setTitle("Next View", for: .normal)
    view.addSubview(button)
    button.translatesAutoresizingMaskIntoConstraints = false

    button.centerYAnchor.constraint(equalTo: view.centerYAnchor).isActive = true
    button.centerXAnchor.constraint(equalTo: view.centerXAnchor).isActive = true
}
In my own personal projects I use a library called SnapKit for doing the contraints. It produces code that's easier to read and less verbose. Another reason is that it handles the isActive states and translatesAutoresizingMaskIntoConstraints flag for me. This is good, because I always forget to set them, and find myself wondering why my layouts aren't working.
When doing your layouts in code, be sure to always add your subview to it's superview before settings up constraints. Otherwise your app will crash at runtime because the view won't have anything to constrain itself to.
Run your app and you'll see your button in the middle of the screen.
Navigation
1. Next we'll setup an action on the button so that we can load another view controller when the user taps it. Place this code just after the last constraint.
button.addTarget(self, action: #selector(nextVC), for: .touchUpInside)
4. Now we have an error. Let's fix this by creating the nextVC function.
@objc func nextVC() {
    let nextVC = UIViewController()
    navigationController?.pushViewController(nextVC, animated: true)
}
This code creates a new view controller and pushes it onto the navigation controllers stack of view controllers. In this example we're just using a UIViewController() but you can replace that with any view controller subclass you like.
Notice how navigationController is an optional. This is a property on ViewController, if ViewController were to not be embedded withing a UINavigationController, this property would be nil and the push wouldn't work.
If you're not using navigation controllers, you can replace this line with the present(animated:completion:) which will popup the next view controller as a modal. The biggest benifit of using navigation controllers is that you don't have to worry about creating back buttons or title bars as this is all handled for you.
Launch your app and try it out!
Sharing Information
Great, we can now launch another controller, but let's customize before pushing it to the viewer.
1. We'll modify nextVC() to generate a random background color for our new view controllers view.
@objc func nextVC() {
    let colors: [UIColor] = [.red, .blue, .yellow, .green, .white, .cyan, .orange]
    let randomColor = colors.randomElement()

    let nextVC = UIViewController()
    nextVC.view.backgroundColor = randomColor
    navigationController?.pushViewController(nextVC, animated: true)
}
Launch the app again and tap on the Next View button...
Tap the back button and tap on the Next View button again... you should see a different color this time. Pretty cool huh?
That's it for this post. You can grab the code for this project from my github here.